


Hosting a Colab GPU runtime on Windows
How I set up a GPU-powered Python kernel (using a Windows machine in my basement).


The title's a mouthful. Let me explain:
I want remote access to a Python kernel with GPU acceleration.
Renting GPU compute is expensive. (I'm just casually tinkering around.)
I have a physical GPU at home, BUT it's on a Windows desktop.
So the question is how do I expose a GPU-powered Jupyter Notebook to a remote machine?
The notebook must have GPU acceleration available.
The notebook must be remotely accessible.
My desktop must not get pwned.
Ideally the Windows host experiences minimal changes or side effects.
After some tinkering, I ended up with an arrangement that checks all the boxes. The Windows machine hosts a Linux environment via WSL. The Linux environment installs Tailscale, so my other machines can reach it. Then the Linux environment acts as a normal notebook server.
Here's how I set it up.
Choosing the Host (WSL)
We start with a standard Windows host machine. On Windows, we also have the option to use WSL or a virtual machine.
Virtual machines do not support GPU passthrough (while the host is also using the GPU). This is a non-starter.
Windows is a yucky operating system. Let's prefer to avoid it.
Dual booting Linux is a possibility, but the Windows host would not be able to operate at the same time.
WSL supports GPU passthrough, but the networking aspect is complicated. However, all of this is solved by Tailscale. This is the preferred route.
Installing Ubuntu (or any other distro) for WSL is pretty straightforward. Once you're on your Linux "machine," you can verify that it does indeed have GPU access.
❯ uname -r
5.15.146.1-microsoft-standard-WSL2
❯ nvidia-smi -L
GPU 0: NVIDIA GeForce GTX 1070Installing Tailscale
For those unfamiliar with Tailscale, the simplest way I can describe is as a VPN that just works. You can reach any machine in the network, even if it's behind a NAT. That way, you don't arbitrarily expose your machine to the public Internet.
Installing Tailscale in WSL comes with a few caveats though. WSL does not come with Systemd enabled, so many services will not work. Tailscale requires a daemon, for example. (We'll also want other services, such as SSH.) Fortunately, enabling Systemd is as simple as modifying a config file. In /etc/wsl.conf, set the configuration as such:
❯ sudo cat /etc/wsl.conf
[boot]
systemd=trueNow you can install Tailscale. You'll also want to install additional dependencies:
SSH for remote access (and port forwarding) to the machine
Tmux to keep the WSL instance and Jupyter server running in the background
# Install SSH server and tmux.
sudo apt install openssh-server tmux

# Enable SSH.
sudo systemctl enable ssh
sudo system status ssh

# Install Tailscale and join the tailnet.
curl -fsSL https://tailscale.com/install.sh | sh
sudo tailscale upYou'll want to configure SSH and Tailscale as necessary. After all of this, don't forget to reboot the WSL instance.
Starting a Jupyter Server
With all the dependencies set up, you can set up Jupyter Lab in your WSL instance. It's a matter of installing a single PyPI package:
pip install jupyterlabPython should come out of the box in the Ubuntu WSL distribution. You may want to install other packages, but that can be done later within the notebook itself.
You can now start a Jupyter server. Most flags aren't critical despite the documentation, but you will need to make sure the server is protected by a token, or else Colab won't be able to connect to it. Additionally, you'll need to set the IP address the server listens on. By default it'll listen on localhost, which prevents remote access.
If you have the server listen on
0.0.0.0, it will accept connections from any origin. Usually this is bad security practice, but since the WSL instance is not publicly accessible, it's the end of the world.Alternatively, you can set it to
$(tailscale ip -4). That forces the incoming connection to come from within the tailnet. The downside to this approach is that you'll have to run port forwarding for Colab even if you're on the Windows host OS. (This is described in more detail later.)
With all the nuances out of the way, here's the command you can copy and paste. Be sure to run it within a tmux session.
# A few notes:
#
# 1) Do this within a tmux session. You can detach from it later.
# 2) You can alternatively hardcode "0.0.0.0" for the --ip flag.
# 3) You can unset --IdentityProvider.token, but don't leave it blank.
#
jupyter lab \
  --no-browser \
  --ip="$(tailscale ip -4)" \
--IdentityProvider.token="image_some_custom_password_here"Once the server is active, you can detach from the tmux session. Be sure to keep the session alive, so the notebook server (and Tailscale connection) do not disappear.
Connecting to Jupyter Lab
Now we switch gears and move to another computer. Before doing so, take a note of the tailnet IP (tailscale ip -4) or hostname of the WSL instance.
From any remote machine, as long as its part of the tailnet, it can simply access Jupyter Lab. Just visit http://wsl-tailscale-hostname-or-ip:8888/lab. Pretty simple!
Connecting to Colab
Warning: Don't do this for any arbitrary Colab notebook running untrusted code. Remember that you're giving it remote code execution privileges on your machine.
Using the Jupyter server as a Colab backend is a bit more involved. Colab only supports localhost as a local runtime host for some reason. So we'll have to port forward. (That's why SSH was a requirement when setting up WSL. Also, if you're on the Windows host, you can skip this step if the server is listening on 0.0.0.0.) In a terminal on your remote machine, forward the port for the notebook server:
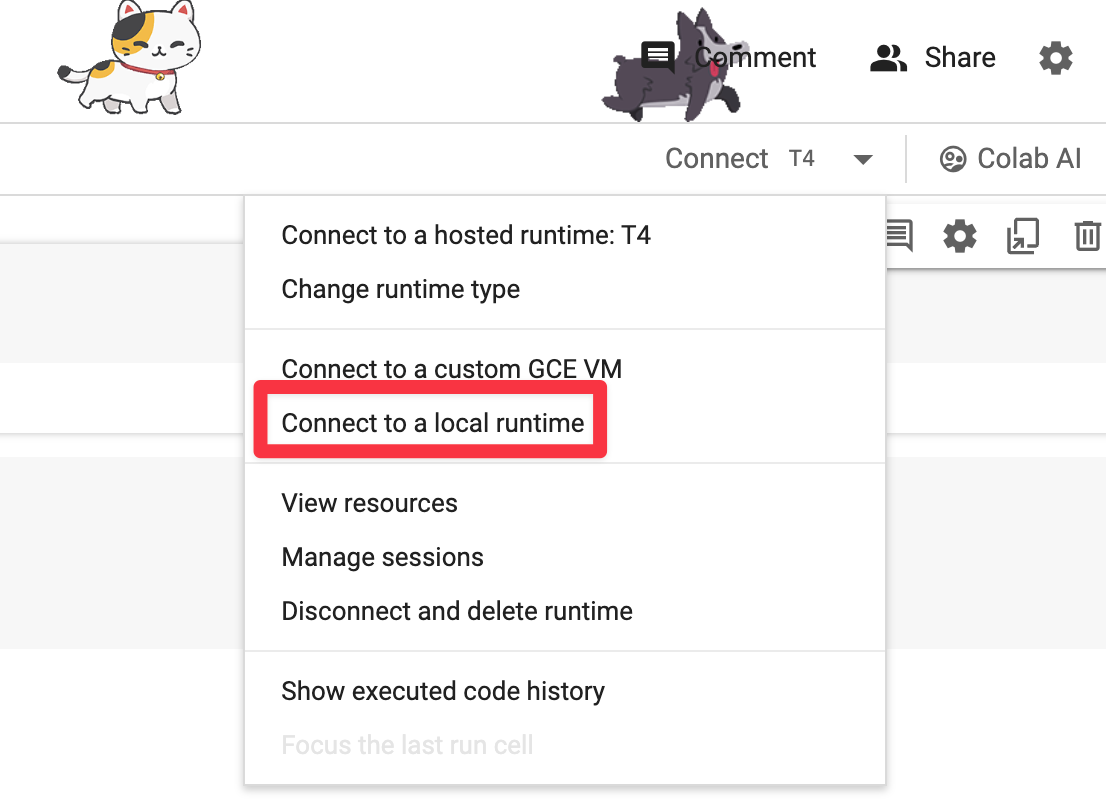
ssh wsl-tailscale-hostname-or-ip -L 8888:localhost:8888Within a Colab notebook, select the option to Connect to a local runtime and then put the local URL with the forwarded port. You'll also need the auth token from earlier.
If the connection is successful, you should be able to interact with the kernel from your Jupyter server. Now's a good time to install any additional PyPI packages that you'd want, since a fresh WSL environment will not have much by default. Otherwise, it's identical to hosted runtimes, except you can keep the kernel alive indefinitely.

That's it! You're done! You can now use your own GPU on Colab from any remote machine.